Gameplay Interaction
info
This guide is applicable for Gameplay Interaction Plugin version 1.1 or higher.
Step-by-Step Setup
1. Download the Demo Project
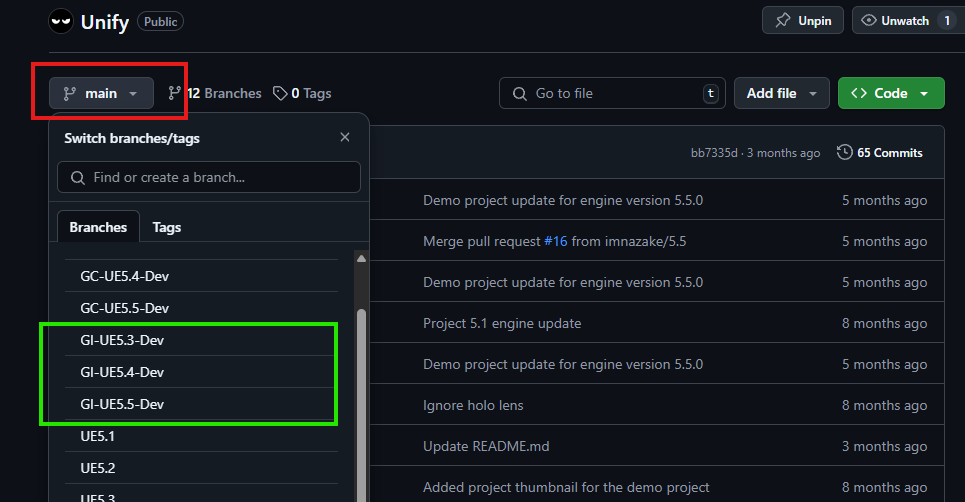
- Download the demo project for Gameplay Interaction from the GitHub repository.
- Choose one of the branches shown in the image below, based on the Unreal Engine version you are using.
2. Download the Plugin
- Obtain the plugin from the Epic Games Launcher or Fab.
3. Copy the Plugin to the Unify Demo Project
- Navigate to the Unreal Engine directory where the plugin was installed.
- Copy the plugin to the Plugins folder in the Unify demo project.
4. Regenerate Visual Studio Solution Files
- Regenerate the project solution files to ensure the plugin is integrated correctly.
5. Open the Project in Unreal Engine
- Open the Unify demo project in Unreal Engine to proceed with further setup.
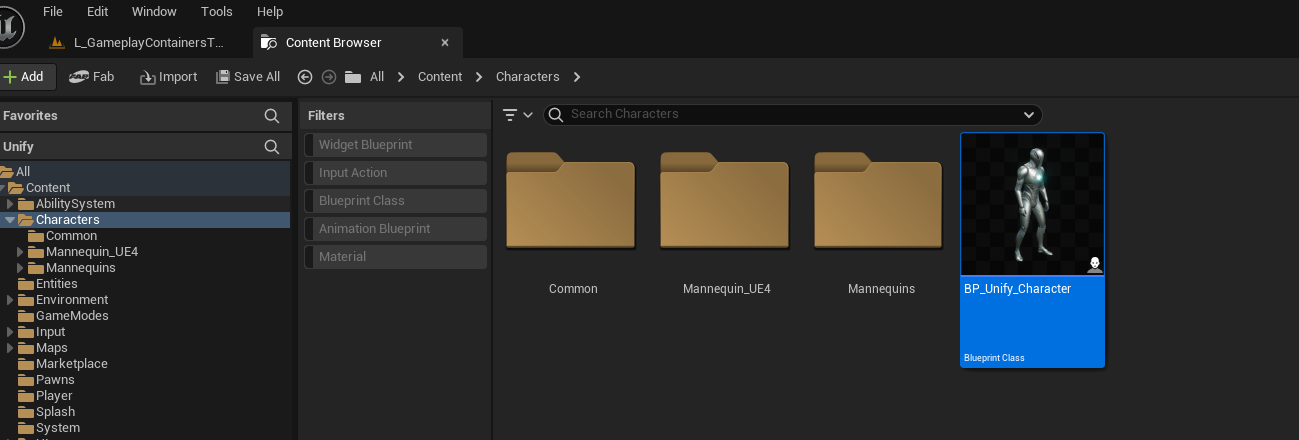
6. Create an Ability Set Data Asset
- Navigate to the Content Browser.
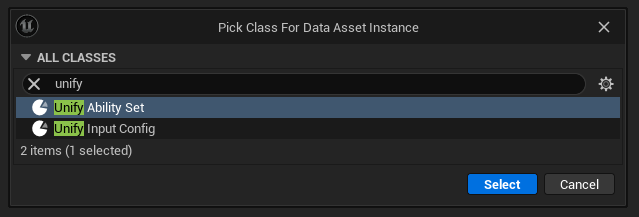
- Right-click and select Miscellaneous > Data Asset.
- In the dialog box, select the appropriate class for the ability set (e.g.,
UnifyAbilitySet). - Name it
UAS_GameplayInteractionor any name of your choice. - Refer to the image below for guidance.

7. Reparent the Abilities C++ Classes
- You will need to open the project source code in your IDE to do this.
- Go to Tools > Open Rider (Or Visual Studio).
- In your IDE navigate to
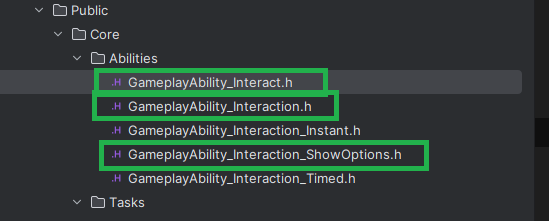
Plugins/GameplayInteraction/Source/GameplayInteraction/Public/Core/Abilities - Reparent the following ability classes:
- UGameplayAbility_Interact > Parent (UUnifyGameplayAbility)
- UGameplayAbility_Interaction > Parent (UUnifyGameplayAbility)
- UGameplayAbility_Interaction_ShowOptions > Parent (UUnifyGameplayAbility)
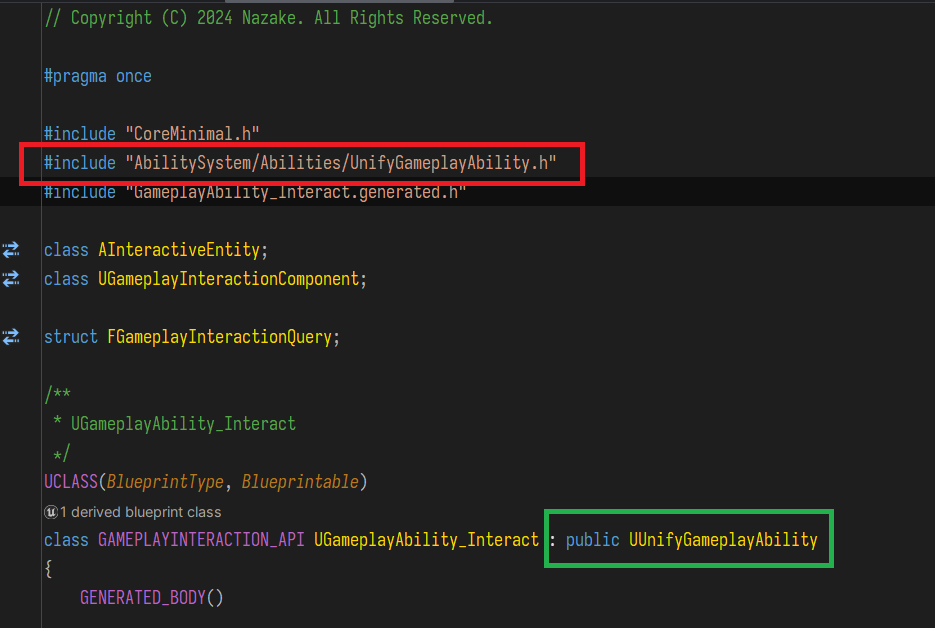
- Add the required includes for the header files
- Remove this include
#include "Abilities/GameplayAbility.h" - Add this include instead
"AbilitySystem/Abilities/UnifyGameplayAbility.h"
- Remove this include
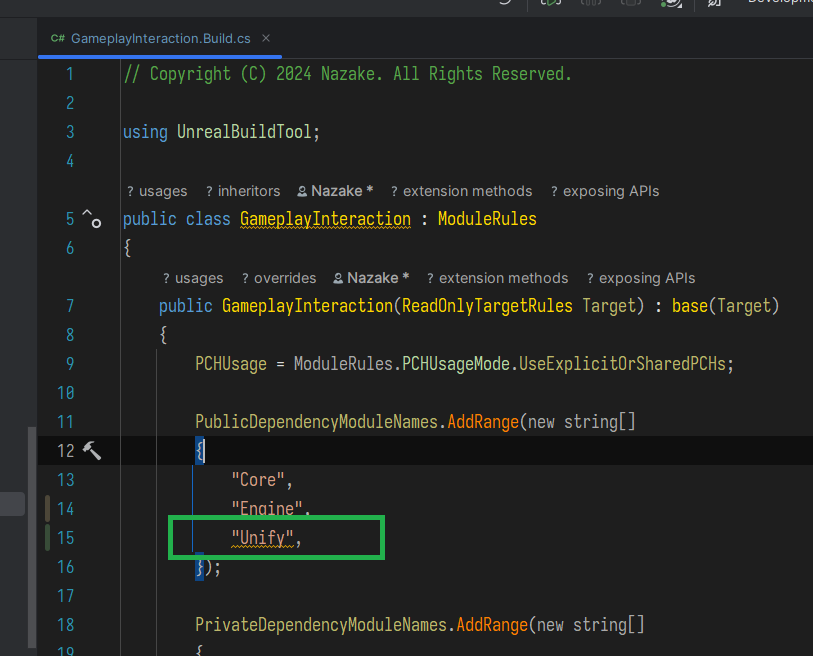
- Add the
Unifymodule name inGameplayInteraction.Build.csinPublicDependencyModuleNames - Save all changes, close the unreal editor and then recompile again and launch the editor.
Avoid Circular Dependency Issues
To prevent circular dependency issues in your project, it is recommended to move the ability classes from the plugin source folder:
Plugins/GameplayInteraction/Source/GameplayInteraction/Public/Core/Abilities
into your project source directory where you have your own abilities.
Alternatively, you can:
- Copy the ability classes
- Rename them appropriately in your project
- Use these copies instead of referencing the original plugin ability classes
This approach is especially useful if:
- You have your own subclass of
UGameplayAbility - You want your abilities to work consistently with your project-specific code
- You want to avoid reparenting plugin classes directly, which often leads to circular dependencies and other complications
By using your own project-local versions of the abilities, you ensure better integration and avoid tight coupling with the plugin.
8. Add Abilities to the Ability Set
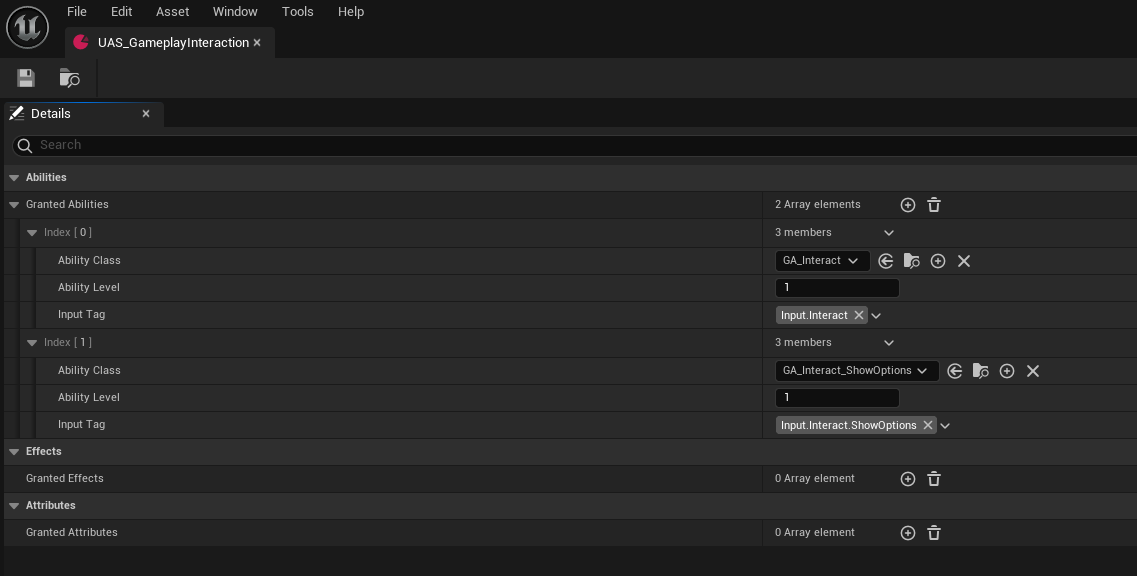
- Open your
UAS_GameplayInteractionability set you created earlier. - Add the following abilities:
- GA_Interact
- GA_Interact_ShowOptions
- Also configure input tags, refer to the image below
9. Add the Ability Set and the Input Config for Gameplay Interaction plugin
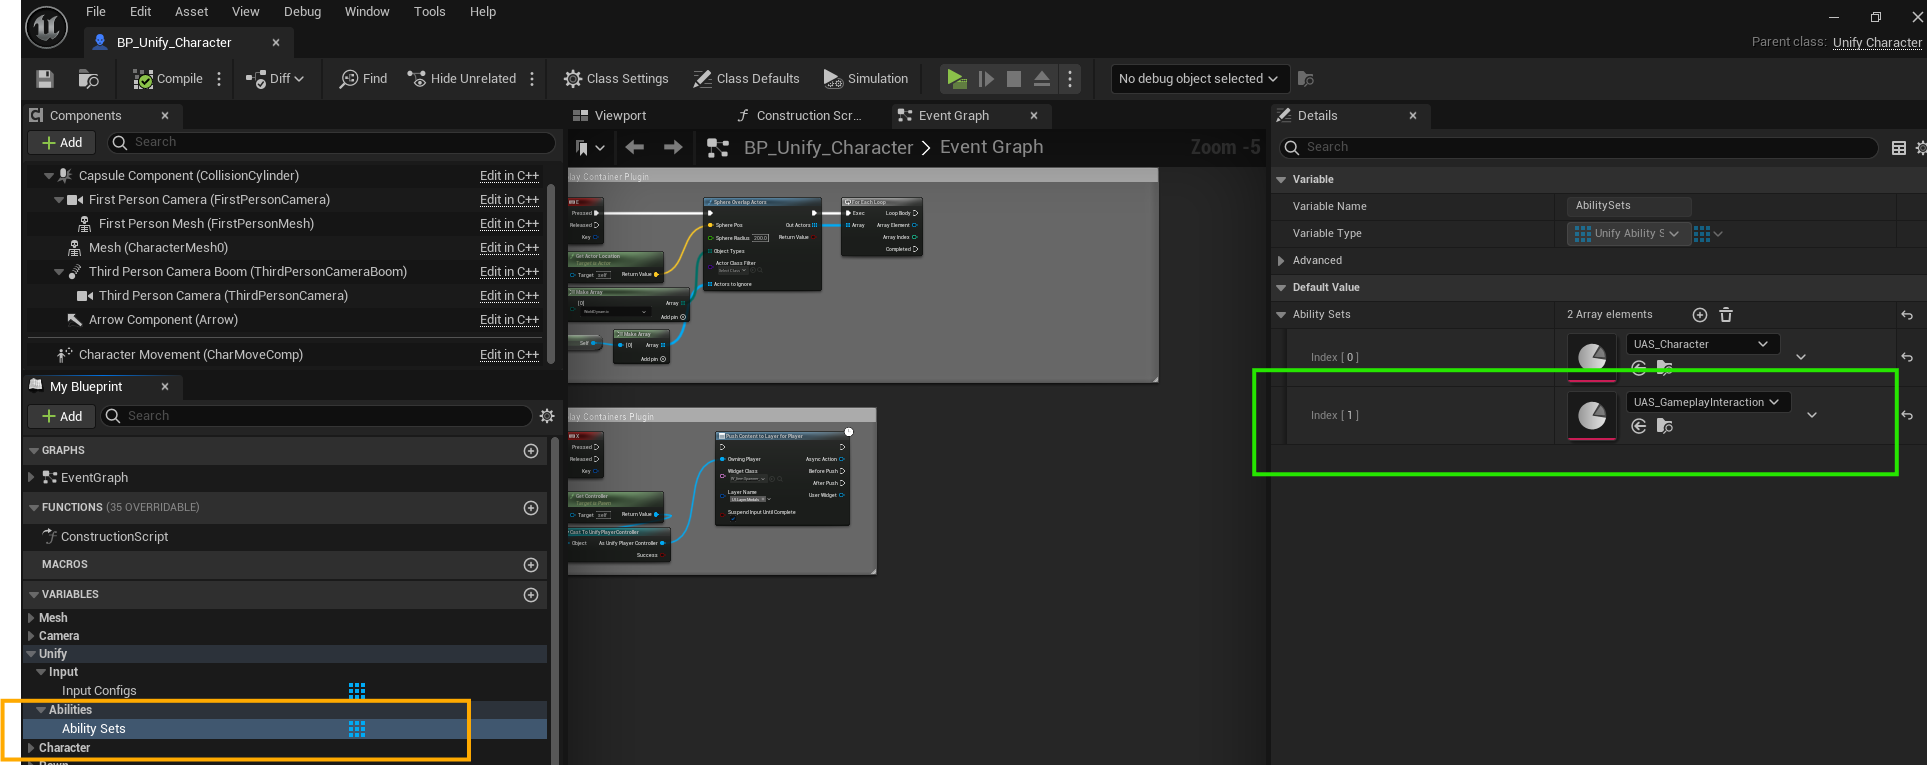
- Add the Ability Set to the Character Blueprint:
- Open the Character Blueprint class.
- Find the AbilitySets array.
- Add the
UAS_GameplayInteraction(or your custom ability set) to the array. - Save the blueprint.
- Create And Add An Input Config to the Character Blueprint:
- Navigate to the Content Browser.
- Right-click and select Miscellaneous > Data Asset.
- In the dialog box, select the appropriate class for the ability set (e.g.,
UnifyInputConfig). - Name it
UIC_GameplayInteractionor any name of your choice. - Refer to the image below for guidance.
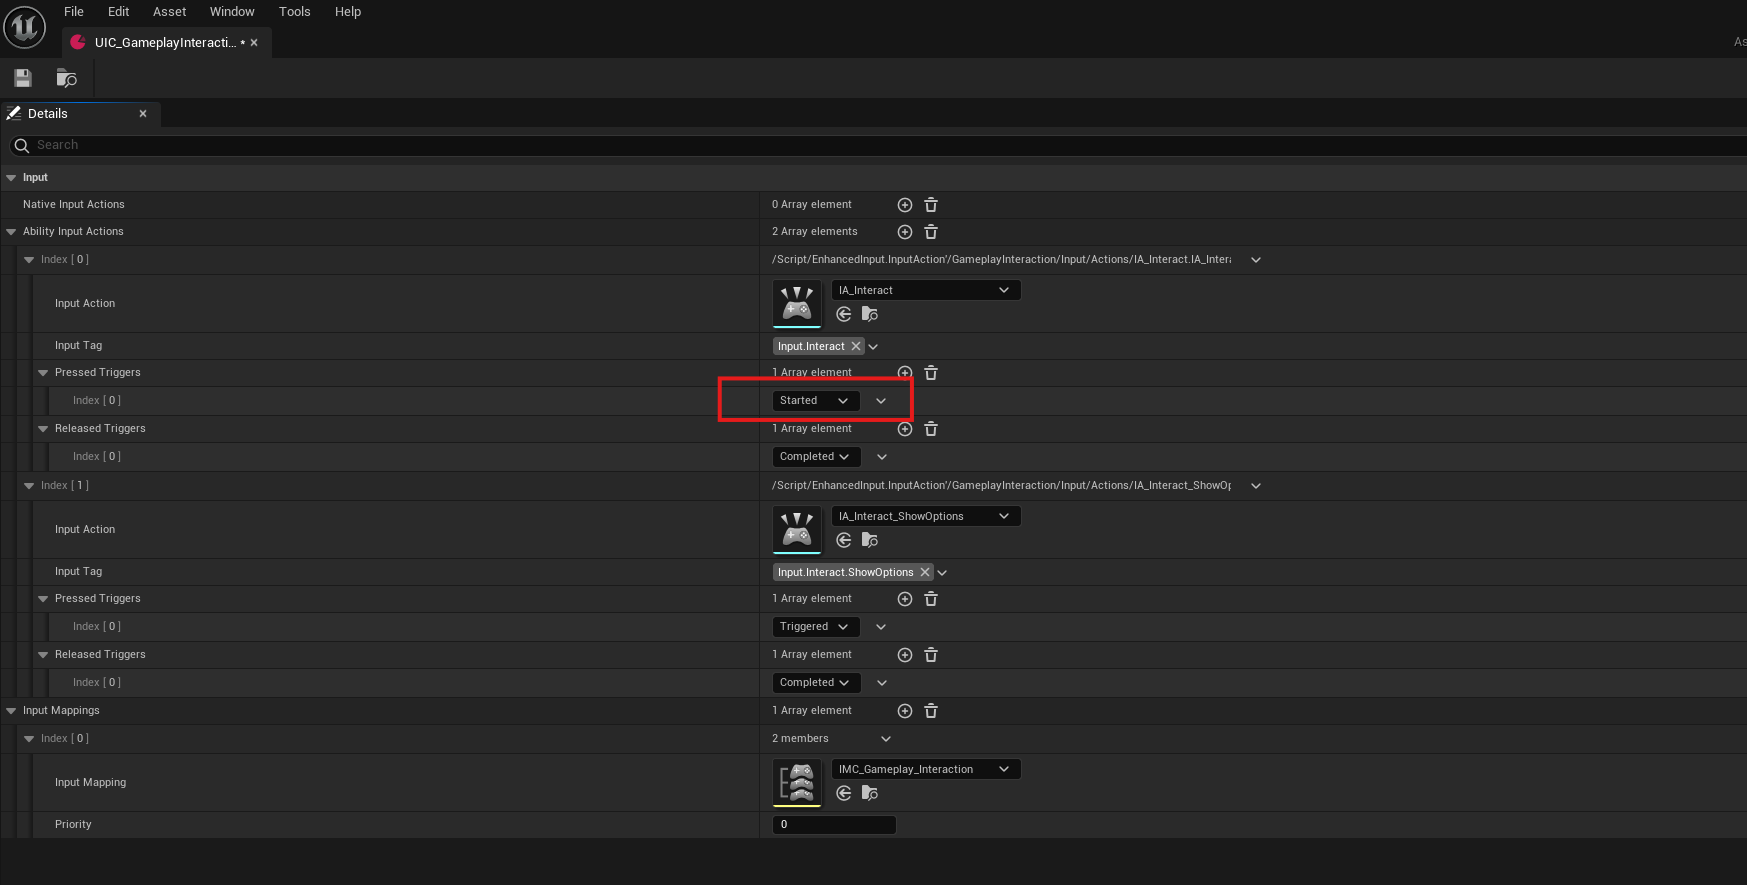
- Open the
UIC_GameplayInteractionand add the following configs to it (refer to the images below).IA_Interactwith input tagInput.InteractIA_Interact_ShowOptionswith input tagInput.Interact.ShowOptions
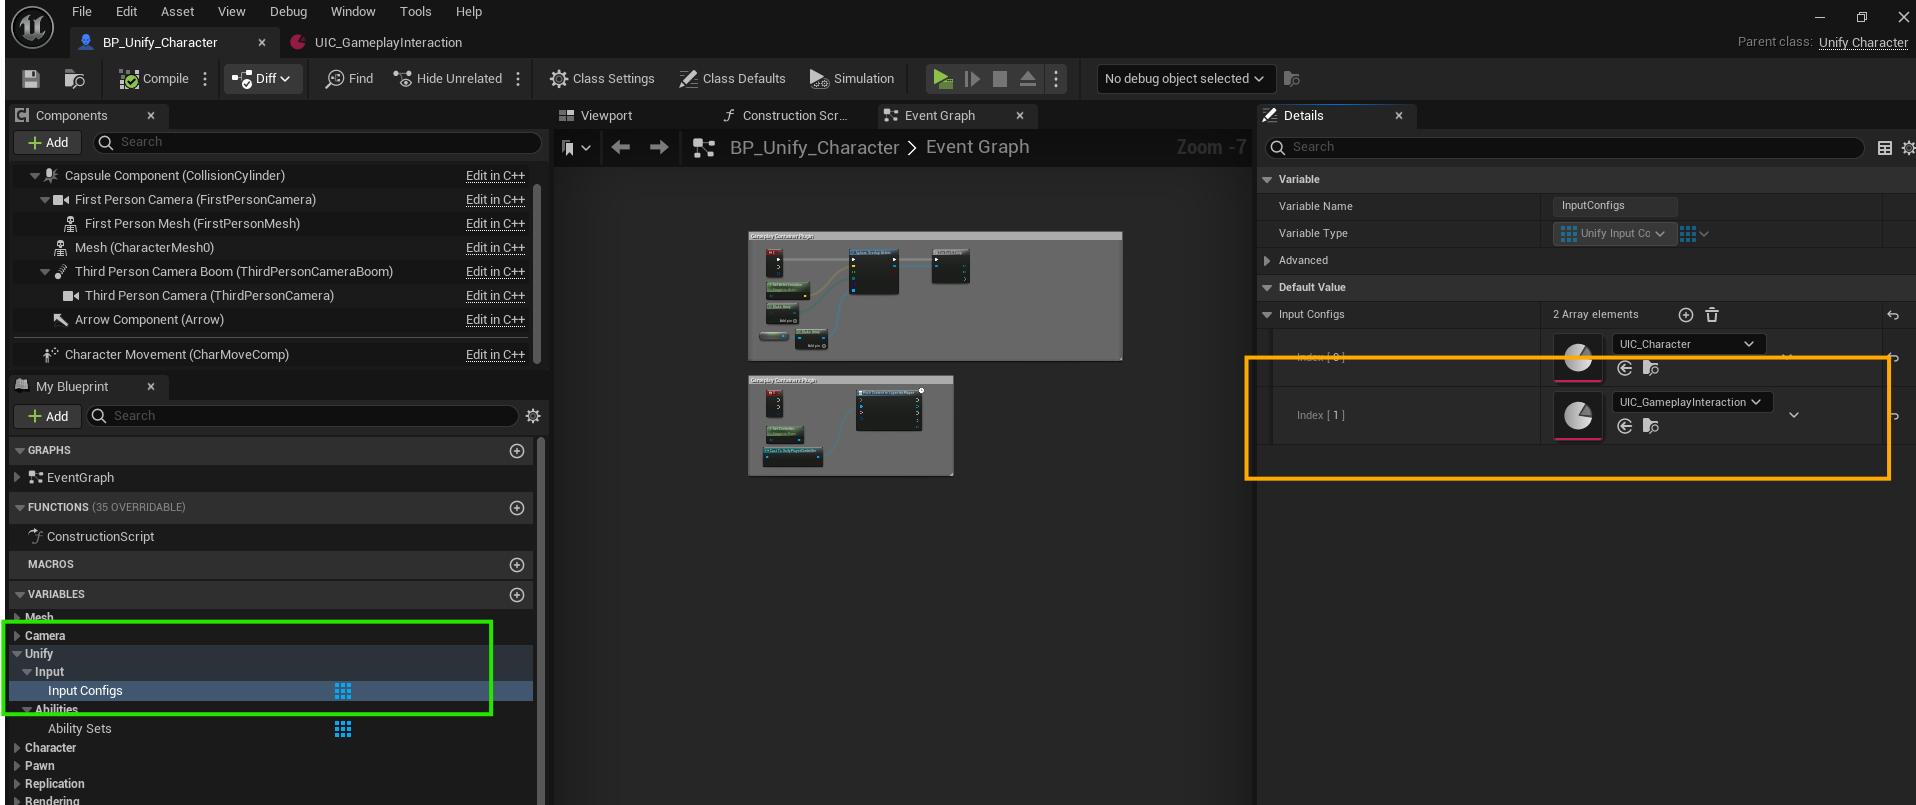
- Open the Character Blueprint class.
- Find the InputConfigs array.
- Add the
UIC_GameplayInteraction(or your custom input config) to the array. - Save the blueprint.

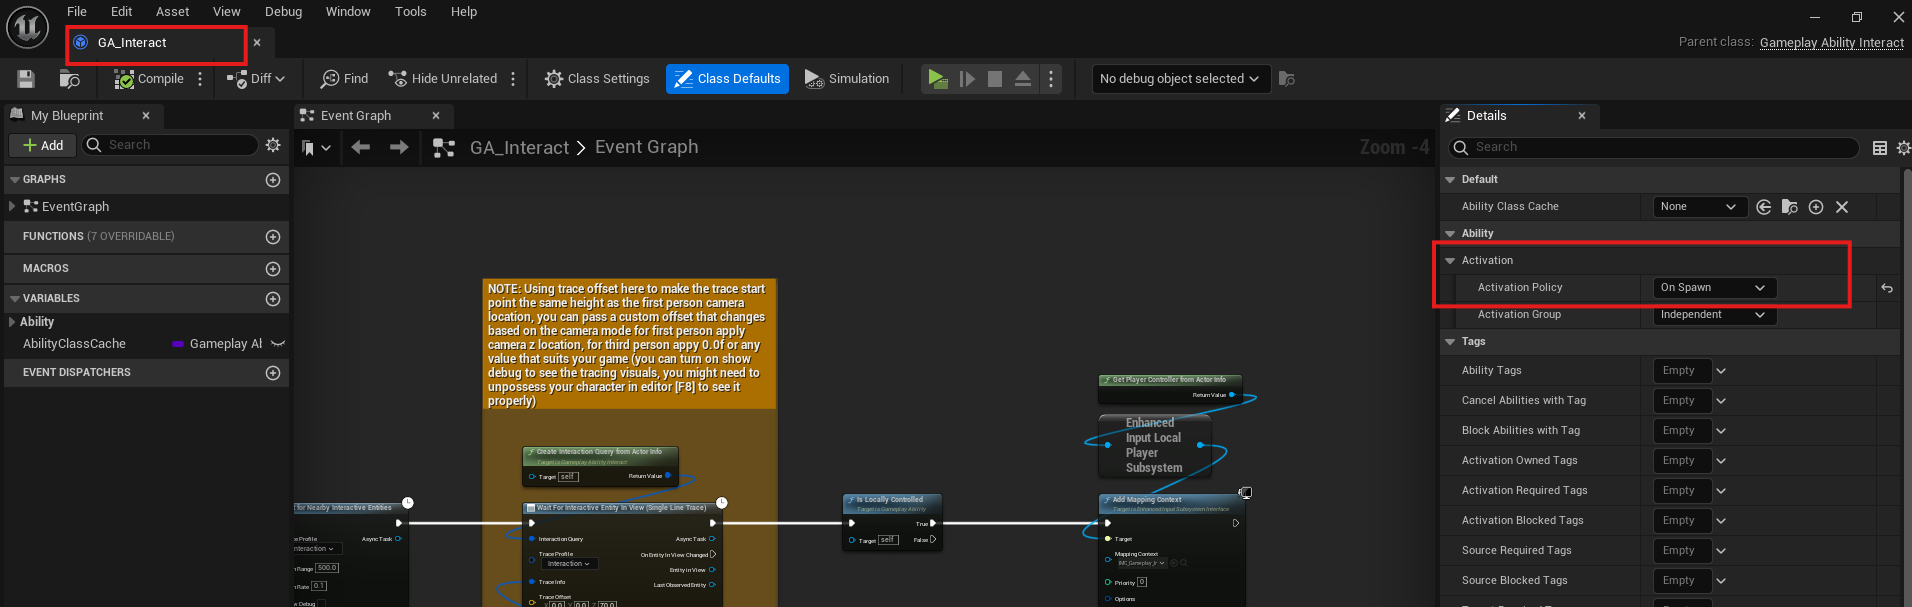
- Configure the Interact gameplay ability:
- In UE Editor navigate to
Plugins > GameplayInteraction Content > Core > Abilities - Open GA_Interact ability blueprint
- Make sure the ability
Activation Policyis set toOnSpawn - Save all changes
- In UE Editor navigate to
10. Test the Plugin
- Press the Play button to test the functionality of the plugin in the project.
You’re all set! If you encounter any issues, refer to the plugin documentation or contact support.