Creating New Containers
This guide explains how to create and configure gameplay containers, including setting up container definitions, configuring slots, and customizing UI fragments. Follow the steps to create functional containers that can hold various items with custom behaviors.
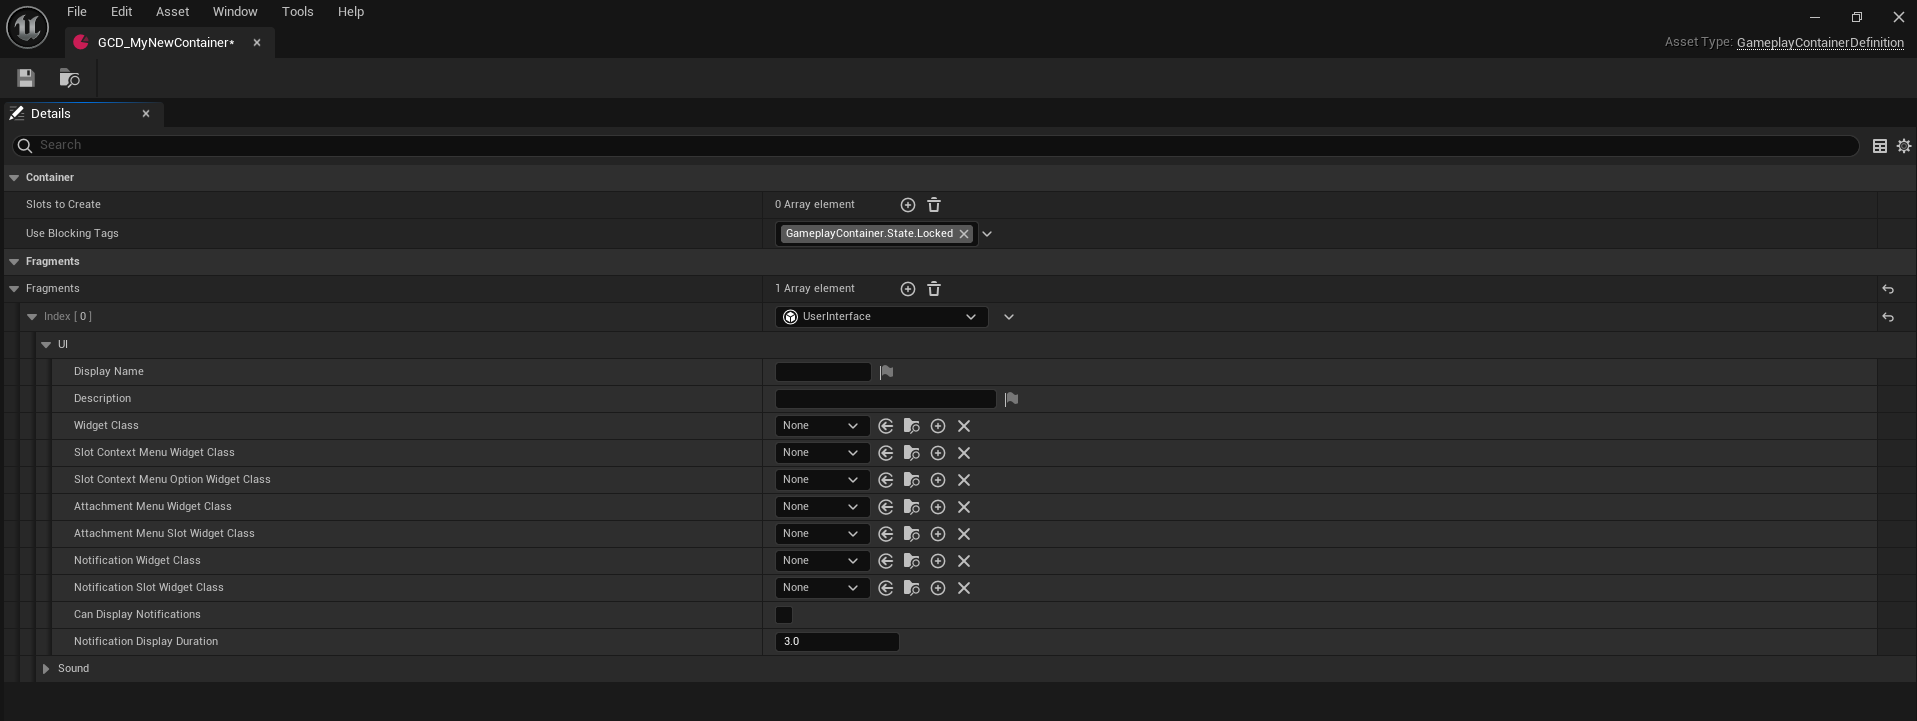
1. Create a New Container Definition Data Asset
To start, create a Gameplay Container Definition data asset. This asset defines the behavior and slots of the container.
Steps:
- In the Content Browser, right-click and select Miscellaneous > Data Asset > GameplayContainerDefinition.
- Name the asset (e.g.,
GCD_MyNewContainer). - Save the asset.
2. Configure the Slots in the Container
After creating the container definition, configure the slots that will be available inside the container. For example, you can create a slot definition like GCSD_MyNewSlot and set the number of slots to 20.
Steps:
- Open the container definition asset.
- In the Slots section, select a Slot Definition (e.g.,
GCSD_MyNewSlot). - Set the number of slots you want the container to have (e.g., 20).
- You can configure multiple slot types within the same container. For example, a container like a fireplace might have separate slots for wood and cooking items.
- Save the asset.
Note: Containers can have multiple slot types at once. For example, a fireplace might have one slot type for wood and another for cooking items. Refer to the Create New Slots page for more details on how to create new slots.
3. Add Fragments to the Container Definition
Gameplay containers can be enhanced by adding various fragments to their definition. Fragments define extra functionality, such as UI display or container permissions.
Available Fragments:
| Fragment Type | Description |
|---|---|
| UI | Displays the container in the UI. |
| Permissions | Defines permissions for interacting with the container. |
| Grid | Used for containers based on grid layouts. |
Steps:
- In the container definition asset, find the Fragments section.
- Add the appropriate fragments for your container. For example, you must add the UI Fragment for displaying the container's UI.
4. Configure UI Fragment
To display the container on the user interface, configure the UI Fragment. You can either use existing UI widgets or create new child widgets to customize the container’s appearance and behavior.
Steps:
- In the container definition, add the UI Fragment.
- If you want to customize the look, create a new widget class that inherits from
GameplayContainerWidget.- Right-click in the Content Browser and select User Interface > Widget Blueprint.
- Name the widget (e.g.,
MyCustomContainerWidget). - Inherit from
GameplayContainerWidget. - Customize the widget's appearance and layout as needed.
- Assign the custom widget to the container’s UI Fragment.
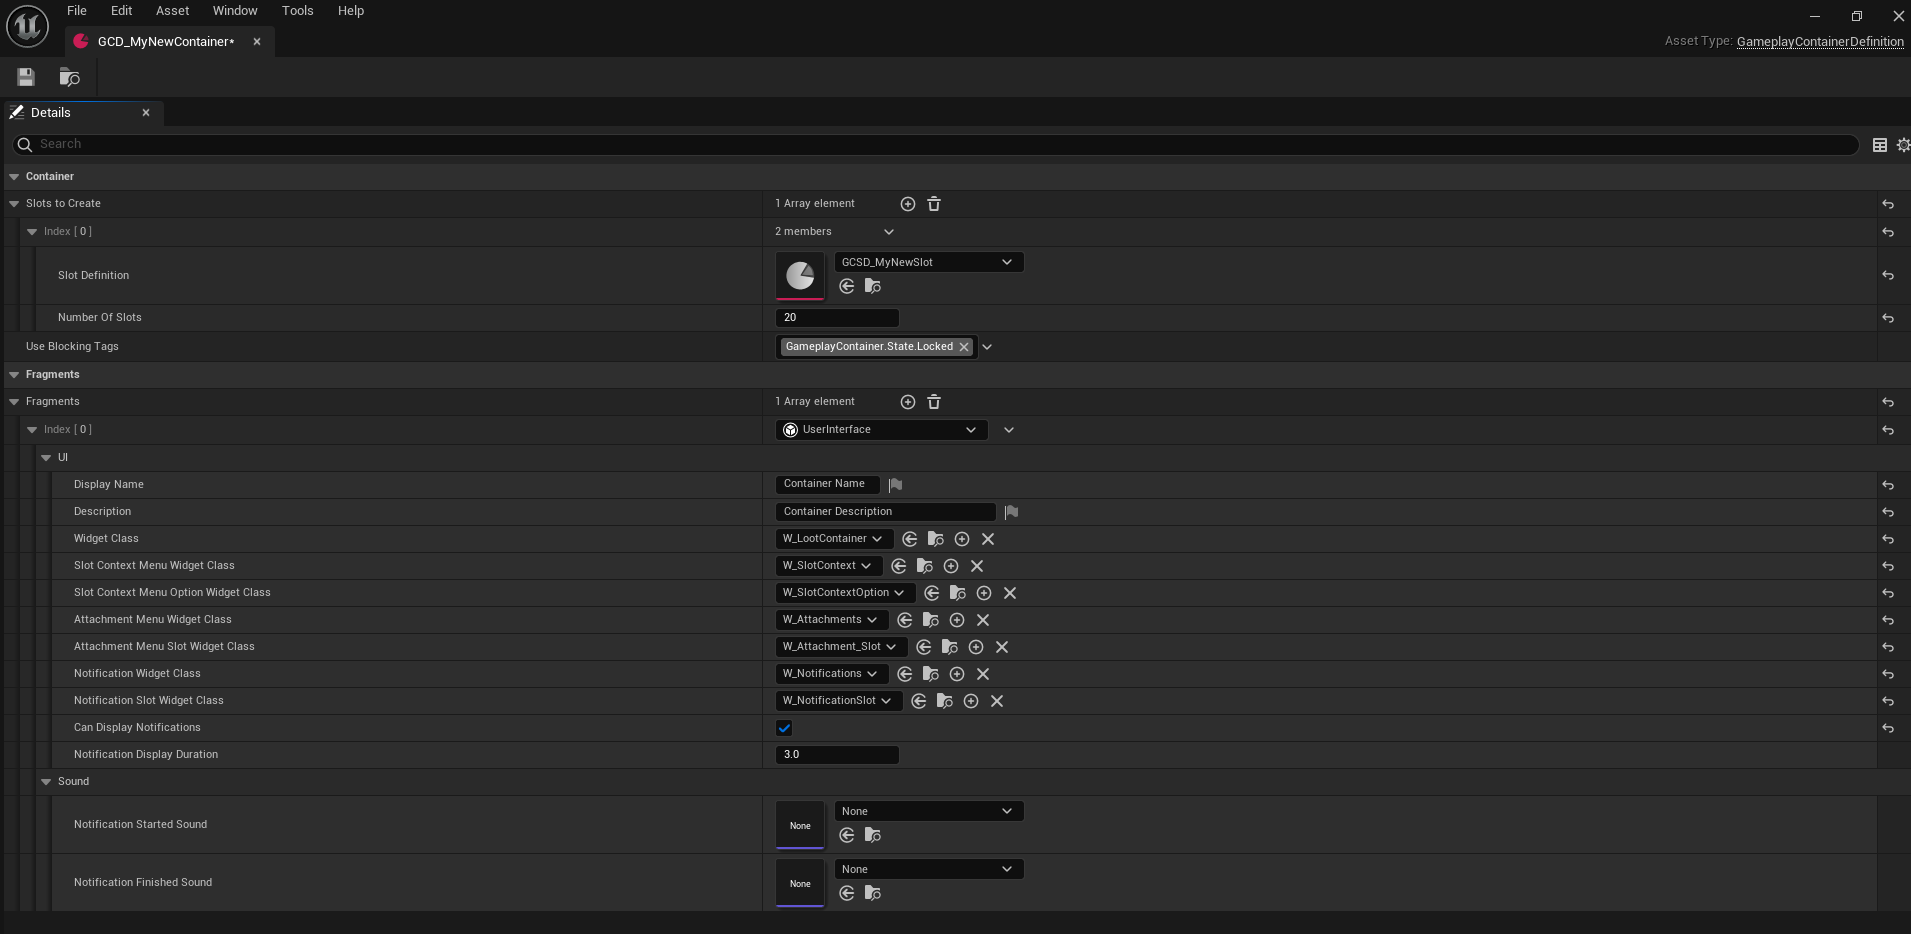
5. Configure Notifications for the Container
You can configure whether the container should display notifications. Notifications are commonly used for player inventories but are generally disabled for other containers, such as chest inventories or storage.
Steps:
- In the container definition, locate the UI Fragment settings.
- Enable Notifications for the container (if desired). This will allow the container to display notifications when items are added or removed.
- Typically, notifications are enabled for player inventories but disabled for containers like storage or chests.
6. Manually Play Sounds on Events
If your container requires sounds, you need to manually trigger the sounds based on respective events (e.g., when a notification starts). You can use the OnNotificationStarted event to play sounds.
Steps:
- In your container blueprint or gameplay system, subscribe to the OnNotificationStarted event.
- Retrieve the sound cue from the container definition.
- Use the
Play Soundfunction to play the sound at the appropriate time.
// Example code to play a sound cue when a notification starts
// You also do it from blueprint, in the notification slot widget, by overriding OnNotificationStarted function
void UGameplayContainerNotificationSlotWidget::SetNotificationTimer(const float ExpirationTime)
{
	GetWorld()->GetTimerManager().SetTimer(TimerHandle, this, &ThisClass::OnNotificationExpired, ExpirationTime, /*bLoop*/ false);
	BP_OnNotificationStarted();

	const UGameplayContainerDefinition* ContainerDefinition = ParentWidget->GetGameplayContainer()->GetContainerDefinition();
	const UGameplayContainerFragment_UI* ContainerUserInterface = ContainerDefinition->GetFragmentByClass<UGameplayContainerFragment_UI>();

	PlaySound(ContainerUserInterface->NotificationStartedSound);
}